A Tall Yellow Creature

Joshua was given 2 assignments from his school which needs to be submitted when school reopens. One of them is to make either a 2D or 3D of his favorite animal. When I asked what animal does he loves most, he told me it a giraffe! I began to think why does he love giraffe so much? And yes, he indeed loves this animal so much that there is a period of time, he kept bugging his grandpa and I to draw this same animal for weeks. And he was not sick of painting it over and over again. 

It all started off with this book called, “Giraffee Can’t Dance”. I remember when I started reading this story to him, he was around 1yr old and I did not know it has created such a great impact on him. As for this story, it was so well written too that tells us that we need to accept what we are and be confident in ourselves. 

  
Well, let’s see how our giraffe turns out. 
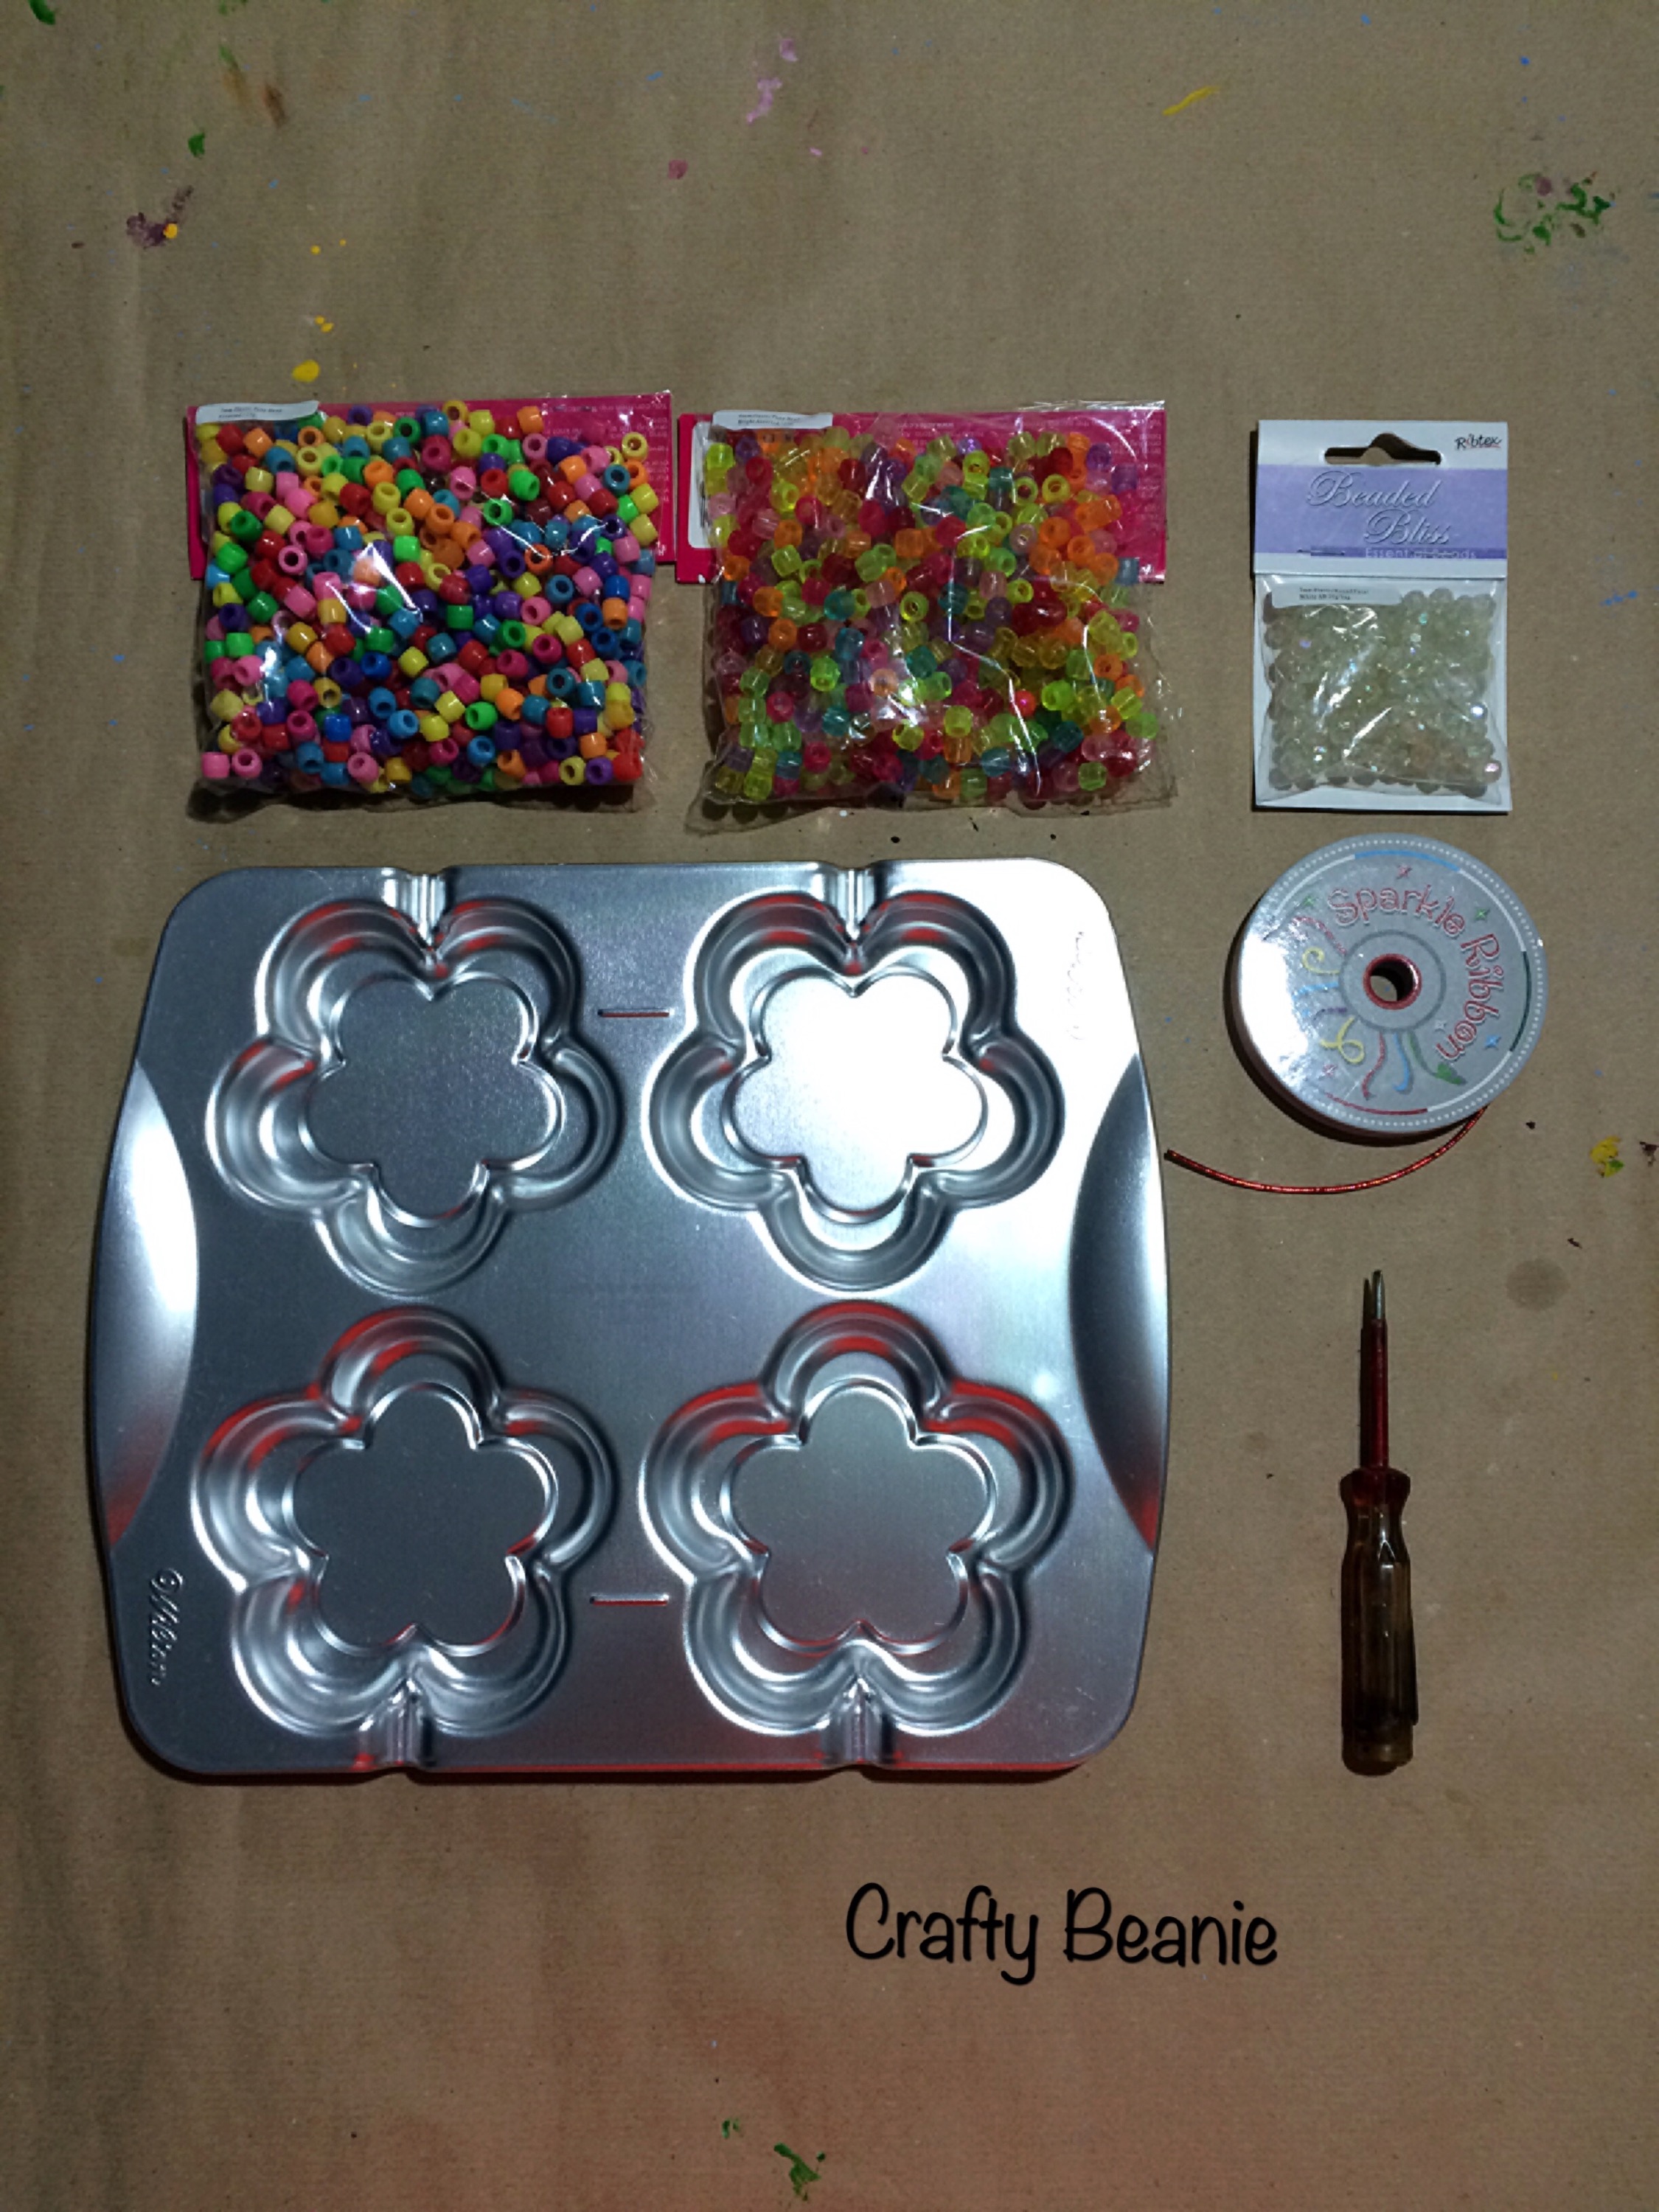
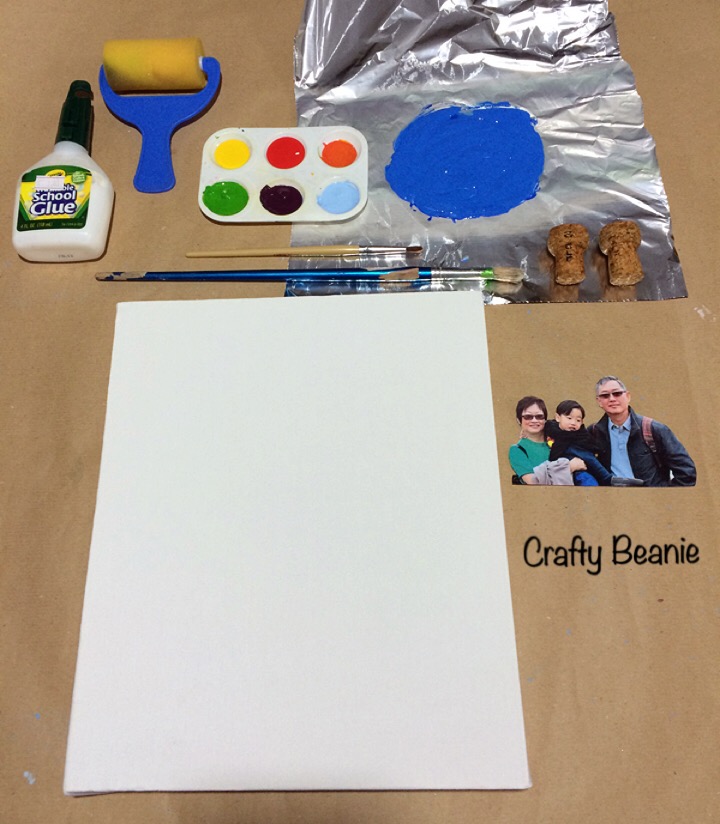
Materials:


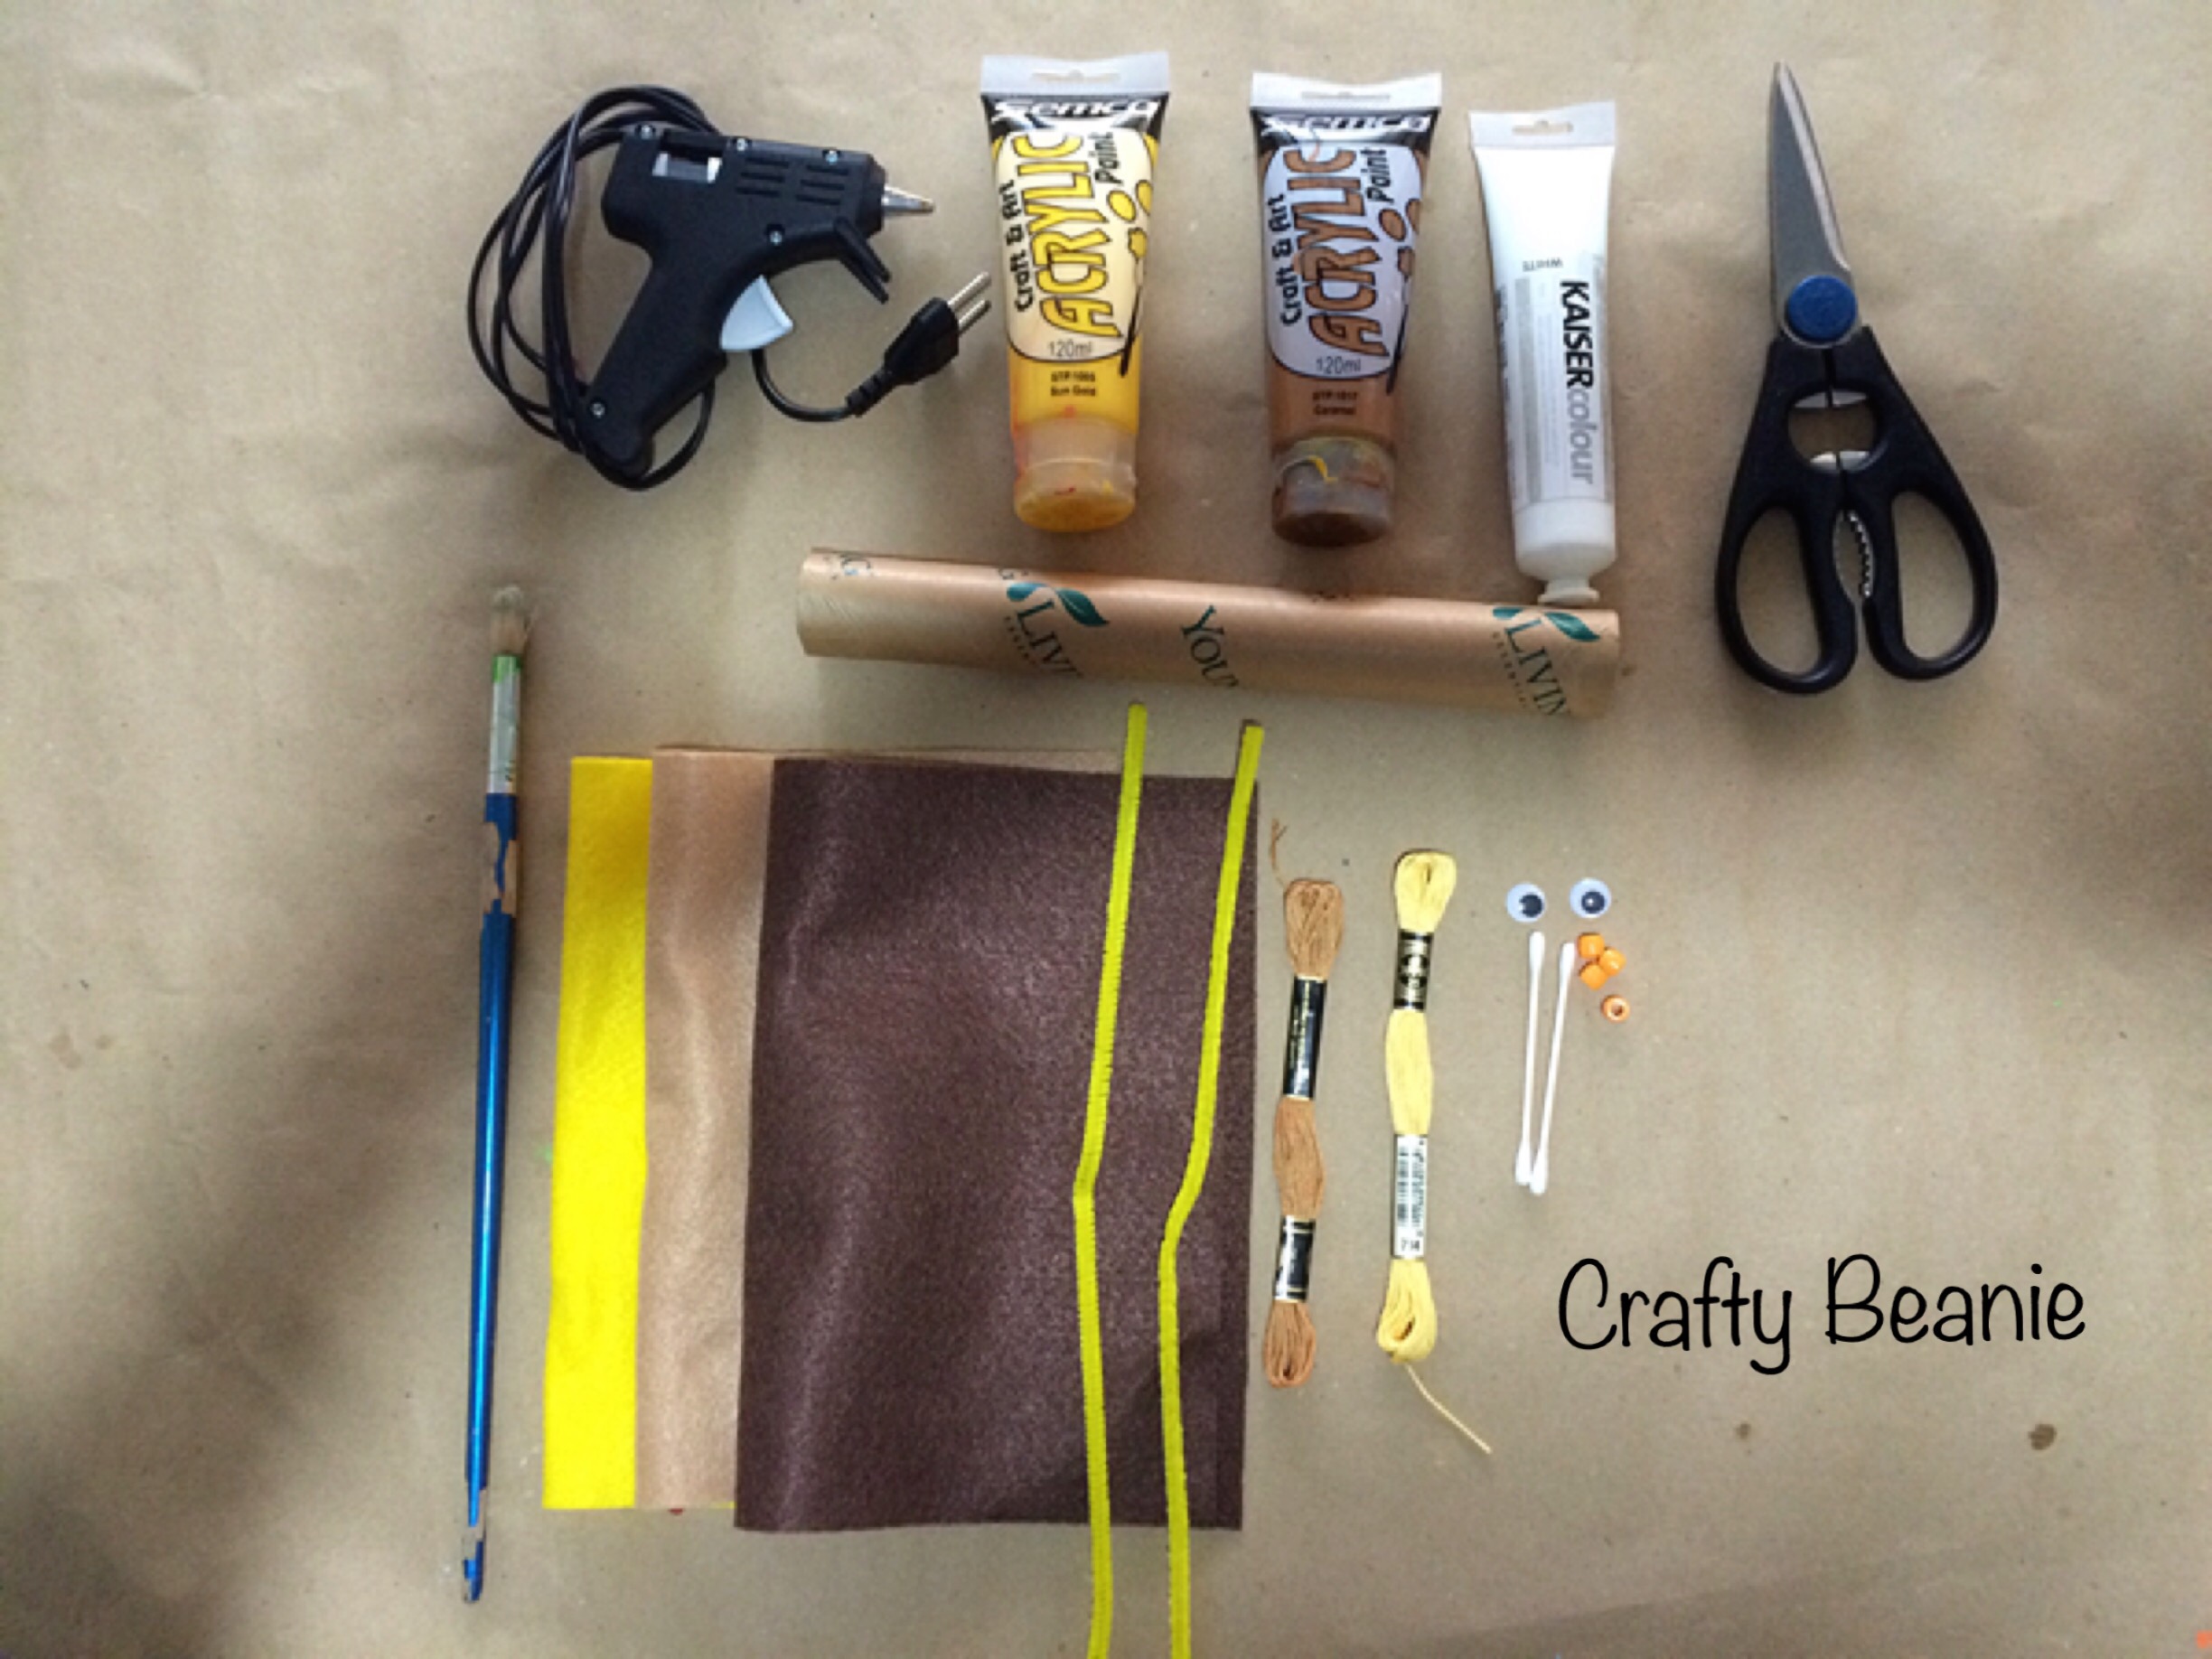
• recycled roll from kitchen towel/toilet roll or any cylinder shaped

• yellow, light brown and dark brown felt

• a pair of spare eyes

• 2 yellow pipe cleaners

• 4 orange beads 

• 2 cotton bud sticks

• white, yellow and brown acrylic paint

• yellow and brown thread

• gun glue

• brush

• a pair of sharp scissors

How to make one:-

1. Cut your recycled roll into 3 parts in various length with the shortest as the head, the longest as the neck and the middle length as the body.

  
2. Paint the roll with a layer of white acrylic paint first and leave dry before painting over a layer of yellow acrylic paint. This is to ensure that the yellow will be totally absorbed into the roll. After painting a layer of yellow, leave dry and using your index finger, dip into brown acrylic paint and dot all over the roll as the pattern of a giraffe’s body.

  
3. Using yellow and light brown felt to cut in the shape of triangle with the yellow one as the larger pieces, two pieces for each color. Place the brown triangle which is smaller in size on top of the yellow and glue it. Tap the ends together and glue it tightly. You have a pair of ears for the giraffe.

  
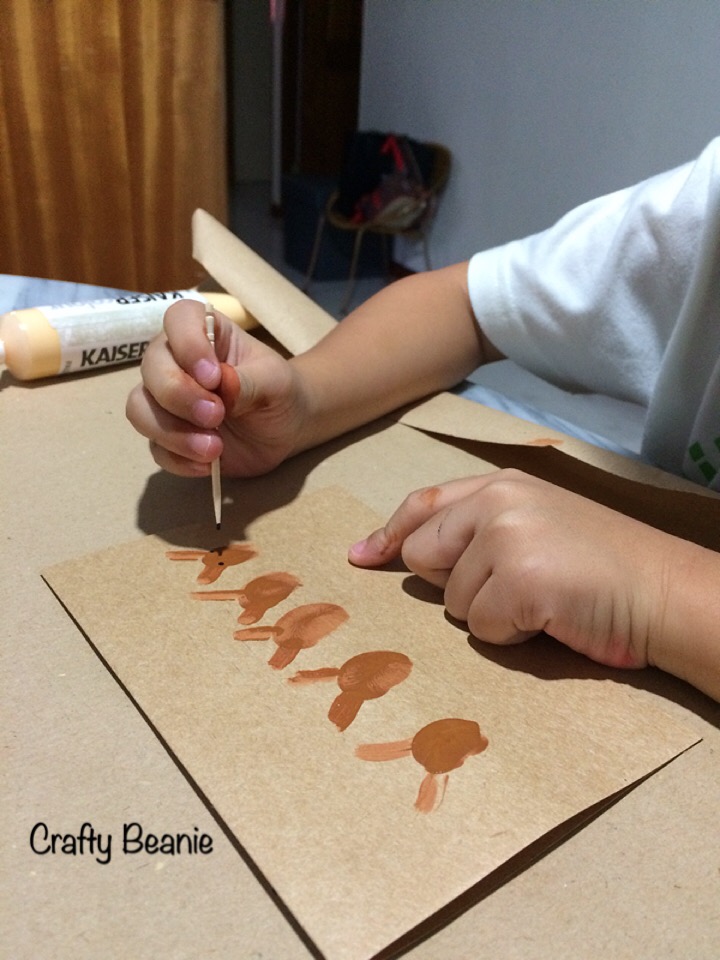
4. Using brown acrylic paint, paint over a cotton bud stick and leave dry.

5. Taking 2 pipe cleaners, cut into half so you have 4 pipe cleaners now. Insert one orange bead for each pipe cleaner and bend the end so that it will secure the bead. And you have the hoofs and legs.

6. Using yellow and brown thread as the tail. Cut at any lengths which you feel comfortable. Preferably the yellow one is longer than the brown one. Cut them into several strands and tie them together.

7. Using dark brown felt, cut into a small rectangle. Each piece needs to be glue at the ends to make the brown mane.

  
8. After all the painted rolls are dried, stick the brown mane which you had made (from step 7) onto the longest roll. 

  
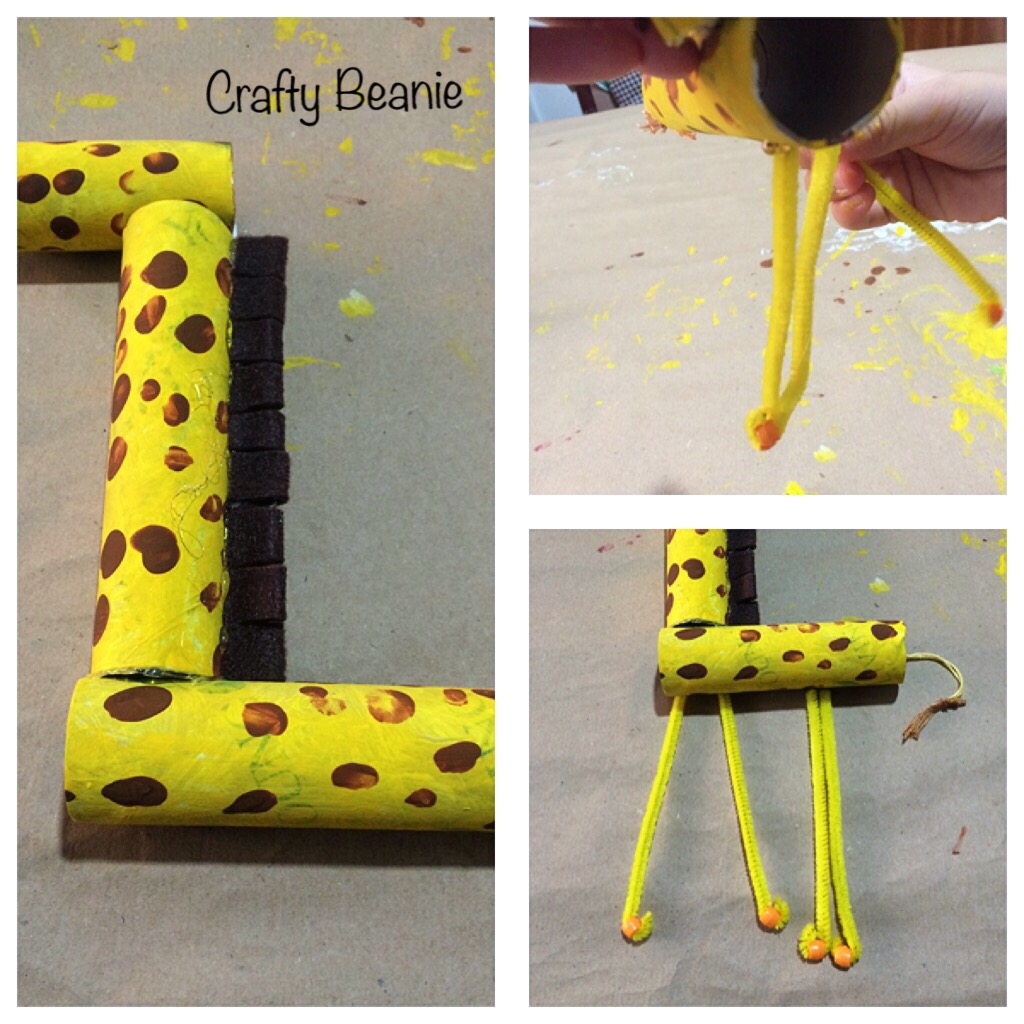
9. Assemble all the rolls together in the form of giraffe body and started sticking them together with hot gun glue.

10. Stick the 4 pipe cleaners with beads underneath the ‘body’ and leave dry for few minutes. You have legs for the giraffe.

  
11. Now stick the ears which you have made previously onto the head. 

12. Taking the brown cotton bud stick which you had painted earlier, cut into half or even shorter and stick them near to the ears. These are the short horns.

13. Since there is an opening on the head, using yellow felt, cut into a circle. Using a clean cotton bud stick, dip into brown acrylic paint and dot two dots at the centre of the yellow circle. Stick it at the opening.

14. Taking the spare eyes, stick one on each side of the head. The head is done.

15. Stick your ‘tail’ at the end of the body.


You are done completely!

Difficulty level: 5 out of 5 stars


Joshua Boy’s Valentine’s Day

We all know that Valentine’s Day is a special day for all couples where almost everyone would be out for a celebration. To Joshua, it is a different occasion. He has two special people in his life whose birthday falls on this special day. One of them is his baby friend, Kaopan whom he knows him since he was a baby. And the other person is his Grandaunt, Emily who he loves him as much as he loves his Mommy!
Instead of buying presents for both of them, he handmade some stuff for these two special people.

Materials:

IMG_6272
• pony beads (prefer to be translucence)
• cookie tray
• ribbon
• scissors
• screw driver (optional)
• super glue/ hot glue
• oven

How to make one:
1. Preheat the oven at 265 degree Celsius
2. Sprinkle a layer of pony beads over the cookie tray. Make sure it just a single layer.

IMG_6276
3. After filling the cookie tray with a layer of pony beads, bring the the cookie tray into the oven. Heat up for 15-20min. (Please open up all windows as the smell from the melted beads is toxic)

IMG_6278

IMG_6279
4. Remove the cookie tray after 20min and let it cool.
5. Once cool, over turn the cookie tray and hit the tray hard for the melted beads to drop out from the tray.

IMG_6283
6. You can either make a hole using a screw driver near the edge of your melted beads (it takes a long time to make a hole). Or, cut a strand of string, tie a knot at the end and stick it at the back using super glue or hot glue.

IMG_6299-0
We have a SUN CATCHER here! You can hang it near your window and let the sun do the job!

You are done 🙂
Difficulty level: 1 out of 5 stars

The Year of Sheep

This year is the year of Sheep. It would be interesting to make some sheep and display in a house.
Sheep is always associates with soft, white and fluffy. So, how can we ensure that our crafts fits these descriptions?

Materials:

IMG_6183
• an egg
• 13mm diameter white pom pom
• a strand of white pipe cleaner
• a small piece of white felt
• white, red and black acrylic paint
• white glue
• a pair of scissors
• cotton stick

How to make one:
1. Poke a hole at one end of an egg (preferably at the pointed end) and wait for the yolk and egg white to drain off completely.
2. You might need to use a paint palette to support the empty egg. Have the pointed end with hole facing upwards. Start dipping the white pom pom with glue and stick them on the egg. Leave it dry. And you have a body here.

IMG_6185
3. Using a pair of scissors, cut out a pair of ear from a piece of white felt. You may draw an outline before cutting it out. (With an adult’s supervision or an adult’s help)

IMG_6186
4. Taking a strand of white pipe cleaner, cut 4 small strands at the length of 1.5cm long. Stick them onto the egg which covered with white pom pom. You can even tilt it upside down which makes it easier to stick them on. You have 4 legs for the sheep now. (Requires an adult’s supervision or an adult’s help)

IMG_6187-0
5. Using a cotton stick, dip one end into black acrylic paint and dot 2 dots on one end of the end that is not covered with white pom pom. You have a pair of eyes here.
6. Using a clean end of cotton stick, dip into red acrylic paint and dot a small dot in the middle of the egg and just right below the pair of eyes. You have a nose.
7. Using another clean cotton stick, dip one end with pink acrylic paint (I have mixed red and white acrylic here) and dot 2 small dots at the side of the egg as cheeks.

IMG_6188

IMG_6189-0
And you are done 🙂
Difficulty Level: 2 out of 5 stars

An ‘UP’ on your Wall

2015/01/img_6018-0.jpg
Today’s art work was inspired by the movie, UP. And we are not using any drawing papers tonight but a piece of canvas.

Materials:

2015/01/img_6012.jpg
• canvas
• acrylic paint, any colors of your choice (I used red, orange, yellow, green, light blue, blue, purple and white)
• cork
• roller brush
• paint brushes (optional)
• photo of any family members
• scissors
• glue

How to make one:
1. Using a roller brush, roll over the blue paint and roll it onto your white canvas. The purposes of using a roller brush to give you a white and blue effect of a sky in a natural way. It is not meant to paint the entire canvas in blue.
2. Using a cork, dip into any color paint of your choice and start stamping on your canvas. What you are stamping is to create tons of balloons effect like the UP movie poster. Clean the cork and work on other colors.

2015/01/img_6014.jpg
3. Cut the people out from your photo, spread the glue and stick it on the canvas. You can position it wherever you like.
4. Using a thin paint brush, dip into white paint and draw strands of strings (optional).

2015/01/img_6016.jpg

2015/01/img_6017.jpg
And you are done 🙂
Difficulty Level: 1 out of 5 stars

Cherry Blossom

Happy New Year People! Yes, this is the second week of Jan and so sorry to wish everyone this late and being MIA (missing in action) for so long!
We were away during the Christmas period and off we flew to Taiwan! During this trip, we travelled around Taipei, Taichung and Nantou. I love Nantou especially. We visited the sheep farm in Cinjing which Joshua loved feeding and chasing after those sheep. And I love this place called Wuling! It is so beautiful and saw Cherry Blossom blooming on the way.

2015/01/img_5895.jpg
A shot which I took by myself using my Canon 60D

I love this shot so much that I got Joshua to paint his own version.

Materials:

2015/01/img_5879.jpg
• a piece of drawing paper
• dark pink, light pink, white, yellow, brown, light and dark blue paint
• paint brush
• unused toothbrush
• an image of any flowers

How to make one:
1. Using the toothbrush, dip it into light or dark blue paint and using your finger to rub against the brush. You should see a sprinkler effect on your white drawing paper.

2015/01/img_5884.jpg
2. Using a paint brush, dip into brown paint and draw strokes for branches.
3. Clean your finger and dip into dark pink paint and draw the flowers on the branches. Using the same color, dot on the branches as buds.
4. Add in light pink paint onto the dark pink flowers. Or like what Joshua had done, he drew some light pink flowers.
5. Dipping into yellow paint, dot it in the middle of the pink flowers.
6. Using white paint, dot tiny little dots around the yellow area.

2015/01/img_5887.jpg

2015/01/img_5888.jpg

And you are done 🙂
Difficulty Level: 1.5 out of 5 stars

PS. The purpose of this exercise is to experience different types of painting techniques.

Christmas Fingers

How fun it is to make your own Christmas cards and explore it with your fingers? We have some fun graphics to share here which you can paint with your kids. So let your fingers do the magic and let your imagination runs wild!!

Please note that we are showing one illustration here

Materials:
• colored construction papers (any colors of your choice)
• some toothpicks
• some cotton sticks
• brown, red and black paint or acrylic paint.

How to make one:
1. Cut the paper to the sizes which you want. Here, we have an A5 size paper and folded into half.
2. Dip your index finger into brown paint and stamp them on one side of your paper. This will be your cover and you have a face.

IMG_5002.JPG
3. Using the same index finger draw one stroke at each side of your finger prints. You have the horns now.
4. Using a toothpick, dip into black paint and dot onto the finger prints to have a pair of eyes.

IMG_5003.JPG
5. Using a cotton stick, dip it into your red paint and dot onto your finger prints again. This time, dot it in the middle, at the edge. You have a big red nose now.

IMG_5004.JPG
We got a reindeer with big red nose!

We did snowmen, Christmas tree, elves, Christmas wreath too!

IMG_5005-1.JPG

IMG_4996-0.JPG

The Magnificent Snowflake

IMG_4575.JPG
I am living in a country where there are no four seasons, only four weather, sunny, windy, cloudy and rainy. And I got to experience my first winter when I made my second trip to South Korea last December.
During my second day there, snow started to fall against the window. I got out from my coach and let the snow fell onto my face gently. I did not realize that it indeed looking like a snowflake till someone told me to look at it closely. It was so so so amazing! I seriously had no idea it looked exactly the same as what I have seen from cartoon! They are just so adorable and so cute to be admired.
To symbolize what I have seen, I made one together with my son who enjoyed snow as much as me.

Materials:

IMG_4564.JPG
• a packet of wooden clothespin
• white paint
• white, silver, light blue glitter
• white glue
• super glue
• paint brush
• a roll of gold thread

How to make one:
1. Using a screw driver, remove the metal thingy that is holding the clothespin. We need 7 pairs of clothespin to make 1 snowflake.
2. Using white glue to stick them with the flat side facing each other. Leave dry.

IMG_4565.JPG
3. Using white paint, paint both front and back. And lay them in a line.

IMG_4567.JPG
4. Before leaving them dry, sprinkle them with white, silver and light blue glitter. Leave dry.

IMG_4569.JPG
5. Using 7 pairs of clothespin, assemble them into a shape of a snowflake. Using super glue/ hot glue, apply on both sides of a pair of clothespin. Leave dry. You have a snowflake now.
6. Cut a small strand of gold thread, go through a small hole of a pair of clothespin and tie a knot.

IMG_4571.JPG

IMG_4574.JPG
And you are done 🙂
Difficulty Level: 2.5 out of 5 stars

A Christmas Twig

IMG_4206-0.JPG

Christmas Tree is a must have item in a house when celebrating Christmas. Regardless whether it is a real or an artificial one.
Do you know how great a real Christmas tree can smell? There is some freshness out from them and with a bit of sweet scent. And It would be better to add some ice instead of water to keep them longer, and lasting. When it withers, just like any ordinary plants, their needle-like leaves begin to turn brown and slowly dropping on the ground. Have you ever wondered how does it look like to decorate a Christmas Tree without any leaves?

Materials:

IMG_4201.JPG
• dried twigs
• color pom pom in assorted colors
• yellow felt
• super glue
• flower cutter
• scissors
• gold string

How to make one:
1. Using a flower cutter, cut a twig into varies length. (Need an adult’s help)
2. Arrange them from the shortest length at the top, followed by the longest length at the bottom horizontally.
3. Using super glue to stick those horizontal twigs onto a vertical twig. Leave dry and you got a ‘tree’ skeleton now.
4. Using assorted colored pom pom, stick them onto the ‘tree’.

IMG_4203.JPG
5. Using a small piece of yellow felt. Cut out a shape of a star. You can trace the shape before you cut. (Need an adult’s guidance or adult’s supervision)
6. Stick the star at the top of the vertical twig.
7. Cut a short strand of golden ribbon, tie a knot and stick it onto the back of the vertical twig.

IMG_4205-0.JPG

IMG_4207.JPG
And you are done 🙂
Difficulty Level: 2.5 out of 5 stars

The Golden Reindeer

IMG_4062.JPG
Reindeers look quite alike to deer and are native to The Arctic. They are well known animal in the Christmas season as they helped Santa Claus flying around, distributing presents!

Materials:
IMG_4050.JPG
• reindeer cut-out
• gold glitter
• a piece of thick paper (any color but prefer lighter shade)
• glue
• sticky tape / super glue
• scissors
• spare eyes
• red pom pom
• pencil
• red string

How to make one:
1. You can either draw a silhouette of a reindeer or can find the template from Google. I got mine from google (make sure the resolution is high). Cut it out and you will have a reindeer cut-out.
2. Place the cut-out on a piece of thick white or light shade paper, trace it out and cut it out.
3. Spread glue over the white/light shade cut-out and sprinkle some gold glitter over it. Shake off the excess.

IMG_4056.JPG
4. Stick spare eyes on the gold glitter cut-out with glue. Position it at the middle.
5. Stick red pom pom at the bottom of the gold glitter cut-out (you can also stick it just beneath the eyes). You have a nose now.

IMG_4058.JPG
6. Cut approximately 10cm long of the red string. Tie a knot and stick it at the back of the gold glitter cut-out with a sticky tape.

IMG_4059.JPG
7. You can leave it everything to dry and ready to hang it up on your Christmas tree.

IMG_4060.JPG
And you are done 🙂
Difficulty Level: 2 out of 5 stars

A Humpty Dumpty Santa Claus

IMG_3951.JPG
Christmas is just 7 weeks away and some households have already started decorating their houses. And yes, we will be doing a craft which associates to Christmas. He is a well-known character to everyone on this planet. He has long white beard, plump, wears red top and bottom, red hat and black shoes. And he is Santa Claus!
But our Santa Claus will be a combination with another character that comes from a popular and classical piece of Nursery rhyme. He is none other than the famous Humpty Dumpty.

Materials:
IMG_3940.JPG
• an egg
• piece of red felt
• red, white, black and yellow acrylic paint
• super glue
• scissors
• small white pom pom
• cotton wool
• pin or needle
• paint brush
• 2 sticks of cotton stick

How to make one:
1. Extract egg white and yolk from an egg by poking two small holes at both ends and blow hard at one end. Make sure there is a bowl to contain the egg white and yolk while blowing it out.
2. Paint half of the egg with red acrylic paint as the body. Leave dry.
3. Using black acrylic paint, paint along the edge of the red paint like a strip of black belt. Leave dry.
4. Draw a square at the middle of the black strip like a belt buckle with yellow acrylic paint. Leave dry.

IMG_3947.JPG
5. Use a cotton stick, dip one end with black acrylic paint and dot two dots on the non-painted egg for his eyes.
6. Mix white and red acrylic paint to make pink. And using the other end of the cotton stick to dip into the pink acrylic paint, dot two dots at the sides of the non-painted surface for his cheeks.
7. Using a clean cotton stick, dip into red paint and dot it just below his eyes for his nose.

IMG_3948.JPG
8. Use some cotton wool, twist it and stick it below his nose as his beard.

IMG_3949.JPG
9. Cut a small rectangle shape from a piece of red felt and roll into a cone shape. Trim the edge.
10. Stick the white pom pom at the end of the cone. You have made his hat.
11. Stick some cotton wool onto the top of the egg (optional).
12. Stick the hat onto the egg.

IMG_3950.JPG
And you are done 🙂
Difficulty level: 4 out of 5 stars